IDX Add-On Quick Start Guide
Introduction
After requesting your IDX Add-On Option, the paperwork process and setup of your main IDX site pages and IDX features generally takes 5-8 business days to complete. The amount of time to complete this setup varies and greatly depends on how quickly your MLS board approves the request.
Once approved you can click here to login to the IDX portal to begin.
The most important sections of the IDX Portal are explained below.
Setup Section
When you first login to your IDX control panel, you will be in the "Setup" (Account) section.
Within this section you can view your default IDX links and manage the basics of your account including the login parameters.
Note that integrating the main default IDX links into your site has already been completed as a part of the setup process. You will see these new pages in either the top or left navigation. The default IDX pages added during setup can be found by clicking on IDX Page Links within Setup. Examples would include Featured Listings, MLS Search, Property Organizer and more.
Design and Branding

Most of the design and branding is already completed by Real Estate Designer for you so there is little to do in this area.
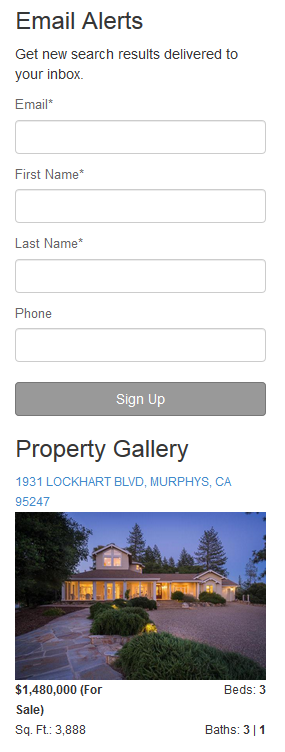
But an important sub-section worth noting is labeled as "Widgets". By default, the right side of your IDX pages include certain widget types. To customize the sidebar widgets, select a page and choose "Customize Sidebar", then drag one or more of the Available Widgets into the Selected Widgets area.
Widget types include:
- Property Gallery
- Contact Form
- Custom HTML
- Listing ID Search
- Listing Address Search
- Quick Search
- Email Alerts
Alert & Email Settings
Manage the basic setup of email notifications and delivery as well as advanced email routing for you and your team.
Here you can also apply your branding to the email notifications that are delivered to your leads. Email branding can optionally include a logo and/or photo with the option to add custom HTML headers and footers as well.
These changes will be visible in the emails delivered to leads who have registered to receive MLS updates within your website.
Search Settings
Within this section the below settings are optional:
- Specify which property types you want included as search options, the names for those property types, and the default price ranges. The customized property type name is displayed on your search page, but does not actually change the property type information displayed on individual listings.
- Add custom search locations with unique names (using MLS areas) that will be added to the autosuggest search form location field.
- Designate which cities to show in the autosuggest location field or just keep the default to show all.
- Manage Open House settings display site wide (on by default).
Listing Settings
Manage how the property results will be displayed after a visitor conducts a search or views your featured properties and market pages. Here are a few of the options:
- Show properties in list or grid format.
- Toggle map on or off.
- Specify number of results per page.
- Set sorting for results by pricing low to high or high to low.
Additonal options for the property details can also be toggled on or off in this area.

Lead Capture and User Registration

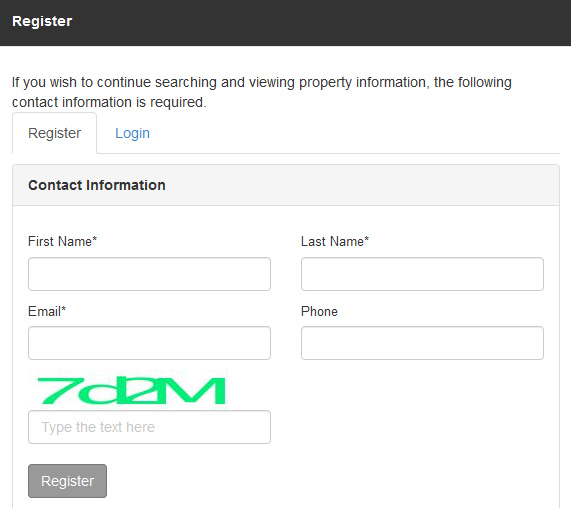
Within this section, you can set exactly if and when the visitor will be prompted to register in order to view your listings.
By default, the registration trigger points are turned off.
Leads Section
View all of your IDX leads generated by visitors to your website IDX pages, with the most recent leads listed first. Click on a lead's name to quickly contact or manage the lead. A summary of recent monthly lead activity and a trend graph illustrating new leads is also displayed.
Reports Section
This section details all site activity in relation to your properties including property views, searches conducted, email signups, etc.
Listings Section
This area displays all of your current MLS Agent or Office listings. If you click on "Show", you can see the details page for each one.
Home Page Search and Featured Properties
On the home page of your site, you will see the quick search and also the property slider widget. These 2 features are optional. Please let us know if you would like us to activate or deactivate for you. By default, they are active.
By default, the properties on the home page slider are coming from your Featured Properties. If you do not have any featured properties, we can alternatively create a slider that will be populated using a specific market page that you create. Please submit this request here if you would like to proceed in this way.

Markets Section (Optional for Additional Listing Pages)
Adding optional market pages offers flexibility if you are interested in creating unique pages that may be more targeted to your audience.
Here you can create segmented listings based on specific criteria that you choose.
To begin, click "Add a Market".
Next, add the name and choose the way in which you would like to create your market listing pages by using the following options:
- Basic MLS Search
- Advanced
- Manual (Add listings by MLS #)
Once you create a new Market page and "Save", you can click on the "Show" link to preview the page. You can then copy this newly generated link to use within our IDX / MLS page type.
Within the main Real Estate Designer Admin Control Panel, follow these steps to add the new market link(s) into your site.
- Click "Add New Page".
- Choose "IDX / MLS Page" page type and click "Next".
- Enter the "Market URL" into the field labeled as IDX / MLS Link.
- Save the page.
- The new page by default will be displayed within the left navigation.
*Important - Manage Menu:
For any IDX pages that have been added by default for you or if you choose to add new market pages, you can adjust where these links are displayed in the menu navigation using the "Manage Menu" tab.
Some IDX pages may not be relevant or needed at this time so you can either delete them or drag them to the inactive section (recommended).